


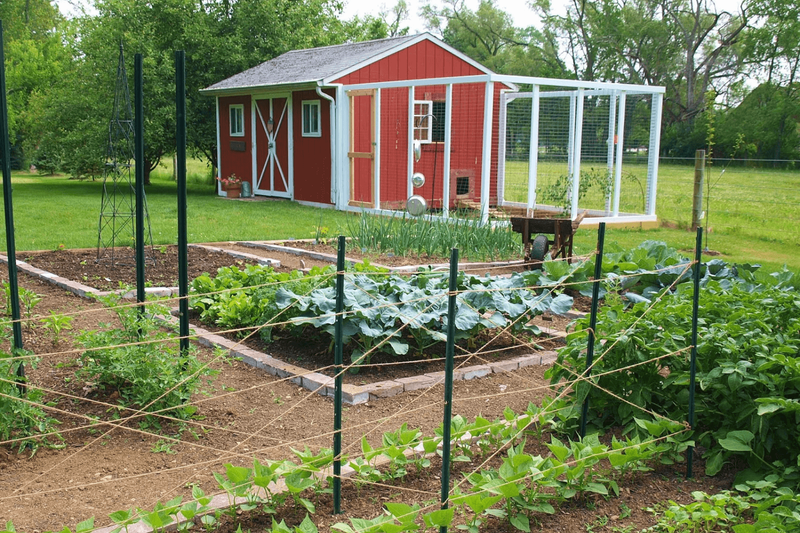
How to Turn a Backyard Shed Into a Chicken Coop


When it comes to creating a comfortable home for your chickens, the first thing that pops up in your mind may not be repurposing your backyard shed, but this overlooked structure could be your hens' new perfect home.
Turning a simple shed into a safe and comfortable coop can provide the ultimate lifelong home for your flock, offering practical benefits for both you and your hens all year round. Here’s everything you need to know to create a hen haven from your backyard shed.
The Benefits
The best part of converting a shed you already have into a coop is that it will save you a significant amount of time and money compared to building or buying a brand-new coop. By converting an existing shed, you can add personal features that provide the best comfort and safety for your flock.
Planning Your Coop Conversion
Start With a Shed Assessment
The first thing you should consider before transforming your chicken coop shed is your hens' needs. If you live in a colder climate, you will need to focus primarily on your insulation and ventilation projects to ensure the best interest of your hens' comfort and health, which will be more significant compared to chicken keepers who live in a naturally warmer climate.
Gather some inspiration from coop structures that you want to implement, and use this time to research and sketch new coop layout designs, as well as compare product reviews. Take advantage of sales to save on high-quality essential features for your coop.
Foundation & Structural Check
Before moving forward with any other work, start by examining the foundation. Make sure it is level and sturdy, then inspect the flooring to confirm it is solid and properly insulated.
A solid foundation helps prevent hazards such as drafts, leaks, moisture buildup and predators digging under the structure. Inspect the structure’s framing to ensure it can support roosting bars and nesting boxes. If you need to install flooring in your shed, focus on creating tight, secure framing, as this will serve as the base for keeping your hens safe and protected.
Another top priority is checking the roof to ensure it is leakproof, especially given the extreme winter conditions you may encounter.
When you add these features, you will feel confident that the foundation is suitable for hens and will prevent any tedious future repairs.
Designing the Ultimate Hen Haven
Once you have examined and planned out the basic foundation of your shed, determine how many hens are appropriate for your structure.
Then, carefully plan the area needed to install electrical wires and outlets for indoor and outdoor lights. In most cases, electrical installations should be installed by a professional. When in doubt, follow local electrical codes or consult with an electrician.
Sketch out the appropriate layout of roosting bars, nesting boxes and areas to place food and water. Make a checklist of tools and materials you will need for your upcoming renovations. Planning and creating a checklist at this stage ensures a smooth, stress-free transition.
When starting your shed-to-coop renovation, consider how to make your chicken chores easier while keeping your hens comfortable in their new home.
For example, having exterior access to nesting boxes reduces time spent in the coop during cold mornings. Electrical planning will also allow for safe, protected lighting on timers. Water systems benefit from insulation or heated bases to prevent freezing. These suggestions are meant to help you avoid unnecessary chores and make your daily tasks of providing for your hens a little easier.
Convert Your Shed
Spic & Span
Once you have an idea and a plan for your new coop, start by clearing out everything from your shed.
Remove anything that can be hazardous to your hens, such as nails, glass and loose debris. Any chemicals, gases or oils should be removed, and you should scrub down all surfaces to ensure the interior is completely sanitized.
After everything is clean, air out your shed before beginning construction. A clean, fresh start helps create a healthy environment and allows for renovation to go smoothly.
Windows & Coop Doors
Adding windows is essential to let your hens get the natural light they need. Natural light is vital to hens’ health and egg production. Research the predator-proof hardware that fits your budget, then seal the necessary openings. Ensure that a daily, easy-access chicken door is installed, and that a human-sized door is reserved for cleaning and other maintenance.
When installing windows and doors, be aware of potential drafts and moisture issues that could arise. Properly seal any gaps around the shed’s floors, doors and windows. If left unnoticed, drafts and moisture can cause long-term damage to your shed’s structure and affect the health of your hens.
Healthy Insulation
Insulation helps regulate the temperature inside the coop, keeping it warm in the winter and cool in the summer. It also helps prevent moisture buildup inside the coop. If you live in a residential area or have neighbors nearby, insulation can reduce the amount of noise that escapes.
To improve air circulation and manage moisture, consider using materials such as rigid foam board (EPS or XPS), mineral wool, sealed straw or hay bales in protected wall cavities. Unlike airtight installations, which can trap moisture, these materials are the most effective.
Using a deep litter system or adding adjustable vent panels can further protect your coop from inconsistent winter temperatures while maintaining healthy airflow.
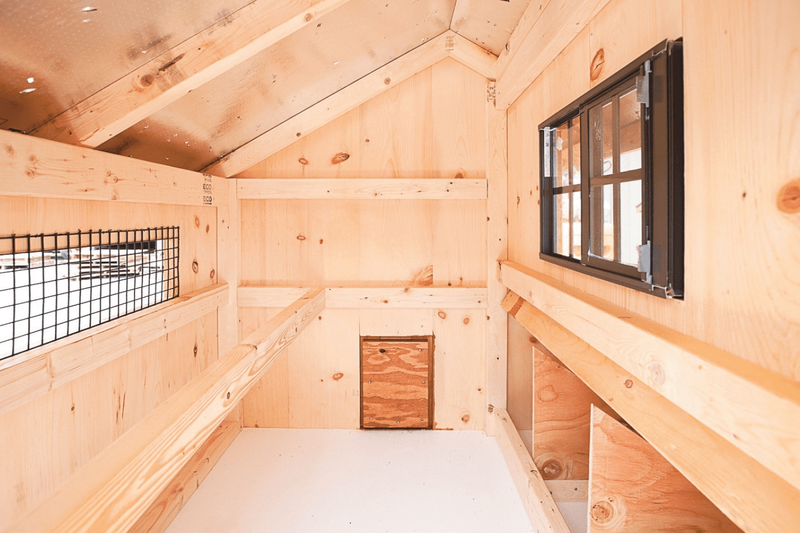
Roosting Bars & Nesting Boxes
When installing roosting bars, be mindful to position them a couple of feet off the ground and spaced well apart from the wall. This allows your hens to perch comfortably. Also, be mindful of the type of wood you use for the roosting bars to prevent splinters; I recommend a smooth or rounded wood.
When deciding where to place nesting boxes, hens are most comfortable in quiet and dark areas that are low to the roosts. Ensure you have one nesting box for every three to four hens, and that both roosts and nesting boxes are easily accessible for the chickens and for cleaning.
Chicken Ramps
When adding chicken ramps, make sure to allow easy access to your hens' nesting boxes. Use sturdy, non-slip materials that allow for an easy incline, especially for hens who may struggle, such as older or larger hens.
Hens will have difficulty in icy or muddy conditions, so attaching cleats or small strips of wood horizontally will create extra grip. Ramps also help prevent injury and allow hens to move freely within their coop.
More Features!
Installing removable droppings boards underneath the roosts helps to maintain cleanliness, making this an easy-to-clean feature. Along with cleanliness, consider adding a dust bath station outside the coop. A dust bath can include sand, ash or a soil mix to limit exposure to parasites for your hens.
For an entertaining feature, add a treat hanger filled with cabbage or other leafy greens. To encourage your hens to lay in their nesting boxes, consider adding curtains along the front of them to reduce stress.
By focusing on the priorities of your coop and planning carefully, your coop will become a place your hens will feel at home in, no matter the time of the year. With these upgrades and features added to your coop, your shed will become a true haven for your hens!
Tags:Farm & Flock


Acreage Life is part of the Catalyst Communications Network publication family.